Protect Your Property with Safe Tree Removal and Emergency Tree Clearing
Why Tree Safety Matters Trees add beauty, shade, and value to any property, but they can also pose serious risks when damaged, diseased, or improperly maintained. According to the National Arborist Association, over 600,000 tree-related accidents occur each year in the U.S., highlighting the importance of professional care. Safe tree removal and emergency tree clearing ensure that hazardous trees are handled efficiently and without risk to people or property. Whether it is a storm-damaged tree leaning dangerously over your home or a dead tree threatening power lines, timely action is essential. What Safe Tree Removal Involves Safe tree removal is a precise process that requires expertise, specialized equipment, and careful planning. Key steps often include: Inspecting the tree for structural weaknesses and hazards Assessing the surrounding area for obstacles like buildings, fences, or vehicles Using professional tools such as chainsaws, cranes, and rigging systems Removing branches systematically to prevent damage Proper disposal or recycling of the tree material By relying on trained professionals, property owners can avoid accidents, property damage, and potential legal liabilities. The Importance of Emergency Tree Clearing Emergencies can happen at any time, often after storms, high winds, or heavy snowfall. Emergency tree clearing provides rapid response to minimize damage and restore safety. Benefits include: Immediate Risk Reduction: Removes dangerous trees before they cause harm Quick Property Access: Clears blocked driveways, roads, or pathways Damage Prevention: Protects homes, vehicles, and utility lines Peace of Mind: Professional teams handle urgent situations efficiently Having access to safe tree removal and emergency tree clearing services ensures that hazards are addressed promptly, reducing stress and preventing further problems. Common Situations Requiring Professional Tree Services Professional intervention is necessary in many scenarios, including: Storm damage leaving trees leaning or partially uprooted Dead, diseased, or dying trees that could fall unexpectedly Trees obstructing power lines or utility access Large trees near homes or structures requiring removal Fallen trees blocking roads or driveways These situations often involve risks that are difficult or dangerous to manage without expertise. Benefits of Hiring Certified Tree Experts Working with licensed arborists and tree service professionals ensures safety and quality. Key benefits include: Experienced Assessment: Proper evaluation of tree health and risk factors Advanced Equipment: Safe removal of large or hard-to-reach trees Legal Compliance: Adherence to local regulations regarding tree removal Efficient Cleanup: Complete removal of debris and restoration of the area Preventative Advice: Guidance on tree maintenance to reduce future risks Certified professionals combine knowledge, skill, and tools to deliver safe, reliable outcomes for homeowners and businesses. DIY Precautions and Tips While professional services are essential, homeowners can take precautions to minimize tree hazards: Regularly inspect trees for signs of decay, cracks, or leaning Trim small branches and deadwood to reduce weight stress Avoid planting large trees near structures or power lines Keep a list of emergency tree service contacts for quick response Do not attempt to remove large or dangerous trees on your own Simple preventative measures complement professional services and help maintain a safe landscape. Final Takeaway Trees are valuable assets, but safety should always come first. Safe tree removal and emergency tree clearing provide professional, timely solutions to protect people, property, and landscapes. By combining regular maintenance, expert removal, and rapid emergency response, you can enjoy the benefits of trees while minimizing risks. Investing in certified arborists ensures your property remains both beautiful and safe.
Protect and Preserve Your Trees with Tree Health Inspection and Maintenance Experts
Trees are more than just a part of your landscape. They provide shade, improve air quality, enhance property value, and create a sense of tranquility in your yard. However, healthy trees require regular care and attention. Professional tree health inspection and maintenance experts can ensure your trees thrive for years to come, preventing costly damage and maintaining a beautiful outdoor environment. According to the International Society of Arboriculture, proper tree maintenance can increase a property’s value by up to 20%, highlighting the importance of investing in expert care. Why Tree Health Inspections Are Essential Tree health inspections help identify problems early, keeping your trees safe and strong. Experts look for: Signs of disease or pest infestations Structural weaknesses in branches or trunks Root damage or soil issues Watering and nutrient deficiencies Regular inspections by tree health inspection and maintenance experts can prevent hazards such as falling limbs or disease spread, protecting your property and family. Benefits of Professional Tree Maintenance Maintaining your trees goes beyond aesthetics. Here are some advantages of hiring professionals: Increased tree longevity and vitality Enhanced safety for your property and loved ones Prevention of pest infestations and disease Improved landscape beauty and shade coverage Compliance with local regulations and property standards Proper maintenance ensures your trees remain an asset, not a liability. Services Offered by Tree Health Experts Tree care professionals provide a range of services to meet your specific needs: Routine health inspections and evaluations Pruning and trimming to promote growth and safety Fertilization and soil health improvement Disease and pest treatment programs Emergency tree care after storms or damage With comprehensive care, tree health inspection and maintenance experts keep your landscape vibrant and resilient. Tips for Maintaining Tree Health Between Professional Visits Even with expert care, there are steps homeowners can take to support tree health: Water deeply during dry spells Mulch around the base to retain moisture and reduce weeds Avoid damaging roots with heavy equipment Monitor for early signs of pests or disease Schedule seasonal inspections to address problems promptly Simple actions combined with professional guidance make a significant difference in tree vitality. Conclusion: Invest in Expert Tree Care for a Thriving Landscape Your trees deserve professional attention to remain healthy, safe, and visually appealing. Hiring tree health inspection and maintenance experts ensures regular monitoring, preventative care, and prompt intervention when issues arise. Healthy trees enhance your property’s beauty, provide long-term benefits, and offer peace of mind knowing your outdoor environment is well cared for.
Enhance Your Yard with Safe Tree Removal and Expert Pruning for Residential Landscapes
Trees bring beauty, shade, and value to any home, but without proper care, they can become hazards or lose their visual appeal. Whether a tree is damaged, overgrown, or simply in the wrong spot, safe tree removal and expert pruning for residential landscapes ensures your yard stays attractive and secure. According to the International Society of Arboriculture, properly maintained trees can increase property value by up to 20 percent, making tree care both a safety measure and a smart investment. Why Tree Care Is Important Healthy trees contribute to your home’s overall landscape, but neglected trees can pose risks. Overgrown branches can interfere with power lines, obstruct views, or create safety hazards during storms. Damaged or diseased trees may fall unexpectedly, causing property damage or injury. Professional safe tree removal and expert pruning for residential landscapes addresses these concerns while improving the health and appearance of your trees. Key benefits include: Reducing the risk of property damage or personal injury Promoting strong growth through strategic pruning Enhancing the aesthetic appeal of your landscape Preventing the spread of disease to other trees and plants With expert care, your trees can remain beautiful, healthy, and safe for years to come. The Benefits of Expert Pruning Pruning is more than trimming branches. It involves careful planning and knowledge of tree species to improve structure, health, and appearance. Some benefits include: Removing dead or diseased branches to prevent decay Shaping trees for balanced growth and visual appeal Increasing sunlight penetration to surrounding plants Enhancing fruit and flower production for ornamental or edible trees Regular expert pruning ensures that your trees grow strong, maintain their shape, and complement your landscape design. Safe Tree Removal: When It’s Necessary Sometimes, trees cannot be saved due to disease, structural weakness, or placement issues. Safe removal is critical to avoid damage to your home, lawn, or neighboring properties. Professional services typically include: Assessing tree health and risk factors Using specialized equipment for controlled removal Clearing debris and disposing of materials safely Stump grinding and site cleanup for a polished result Choosing experts guarantees that tree removal is handled efficiently, reducing the chance of accidents and property damage. Signs You Need Professional Tree Services Homeowners should consider professional tree care when they notice: Leaning trees or unstable root systems Dead, dying, or broken branches Signs of disease such as fungus or unusual growths Overcrowding or interference with structures and utilities Addressing these issues early with safe tree removal and expert pruning for residential landscapes prevents costly repairs and keeps your yard safe. Seasonal Tips for Tree Maintenance Regular seasonal maintenance supports tree health and safety: Spring: Inspect for winter damage and prune broken branches Apply fertilizer to support new growth Check for signs of pests or disease Summer: Water deeply during dry periods Trim overhanging branches for shade and airflow Monitor for leaf discoloration or infestation Fall: Remove dead branches and debris Prepare trees for winter with mulch and protective wraps Evaluate structural integrity for storm preparedness Winter: Prune dormant trees to encourage healthy spring growth Avoid heavy snow accumulation on branches Plan any necessary removals or replacements Following these practices enhances the benefits of professional tree services while prolonging tree life. Choosing the Right Tree Service Not all tree care providers are the same. Look for: Certified arborists or trained professionals Insurance coverage for liability and property protection Experience with residential landscapes Positive reviews and references from local clients Working with skilled professionals ensures that safe tree removal and expert pruning for residential landscapes is performed with precision, safety, and respect for your property. Final Takeaway Maintaining the health and safety of your trees is an essential part of residential landscape care. Safe tree removal and expert pruning for residential landscapes provides peace of mind, enhances property value, and keeps your yard looking beautiful. By relying on experienced professionals, homeowners can enjoy a safe, thriving, and visually appealing outdoor environment for years to come.
The Benefits of Regular Tree Health Inspections Every Homeowner Should Know
If you have trees on your property, you already know how much beauty, shade, and character they add to your home. But just like any living thing, trees need attention. The truth is that many tree problems start quietly, long before you notice any visible signs. That is why understanding the benefits of regular tree health inspections can save you time, money, and even prevent safety hazards. According to the International Society of Arboriculture, early detection of tree stress or disease can reduce treatment costs significantly because issues are easier to manage when caught early. This simple fact shows how valuable consistent inspections really are. Let us walk through why these inspections matter and how they help your trees stay strong, safe, and healthy. Early Detection Helps Prevent Bigger Problems One of the biggest benefits of regular tree health inspections is the ability to catch issues before they spread. Most tree diseases begin subtly. Leaves may look slightly off color, branches may weaken, or pests may settle in unnoticed. When an arborist examines your trees regularly, they can identify: Early pest infestations Fungal infections Structural stress Soil or nutrient problems Root damage Catching these issues early means easier treatment and a much higher chance of saving the tree. It also helps prevent damage to nearby plants or structures. Protect Your Home and Loved Ones From Hazards Trees may look strong, but weakened branches or unstable trunks can become dangerous, especially during storms. Many homeowners only realize a tree is unstable after a branch falls. By then, the damage is already done. Regular inspections help identify hazards such as: Dead or decaying branches Cracks in the trunk Leaning that indicates root issues Weak branch unions Signs of internal rot A certified arborist can recommend pruning, cabling, or in some cases removal, to keep your property safe. This is one of the most important benefits of regular tree health inspections because it helps prevent injuries and property damage. Improve Tree Growth and Longevity Trees thrive when they get the right care at the right time. Regular checkups help ensure they are receiving proper nutrients, have stable root systems, and are not stressed by environmental factors. Healthy trees grow stronger and live longer. With routine inspections, you can support growth by: Adjusting soil treatments Improving irrigation Managing pests in a targeted way Correcting early structural issues Reducing plant competition nearby When trees grow well, they also improve your home’s curb appeal and add long-term value to your property. Save Money on Repairs and Treatments Many people assume tree care is expensive, but the opposite is often true. Small preventive steps usually cost far less than emergency removals or repairs from fallen branches. Since inspections help detect problems early, you avoid issues that can escalate. A simple example is root stress. If caught early, it may be fixed by improving soil compaction or watering. If ignored, it can lead to tree failure which is far more costly to deal with. This shows another clear reason why the benefits of regular tree health inspections are worth the effort. Protect Your Landscape Investment Trees are valuable assets. Mature trees can increase property value by as much as fifteen percent according to the USDA Forest Service. When you protect your trees with routine inspections, you are essentially protecting the value of your property. Healthy trees: Provide shade that reduces cooling costs Enhance privacy Increase beauty and character Create healthier outdoor spaces Inspections allow you to keep these advantages for decades. Prevent the Spread of Pests and Diseases Tree pests and diseases often spread quickly, especially in communities where yards are close together. Inspections help you identify and manage threats such as borers, scale insects, or fungal infections before they move to other trees. This not only protects your property but also supports the health of the environment around you. Preventing spread is one of the most overlooked benefits of regular tree health inspections, yet it is incredibly important. Conclusion Understanding the benefits of regular tree health inspections empowers you to take better care of your landscape. These inspections protect your home, save you money, prevent hazards, and help your trees live longer and healthier lives. A little routine care goes a long way, and partnering with an arborist ensures your trees get the attention they need. Think of an inspection as a checkup for your trees. It keeps small issues from becoming big ones and helps you enjoy beautiful, strong, and safe trees year after year.
Trex Deck Installation Guide: Build a Durable, Beautiful Outdoor Space with Confidence
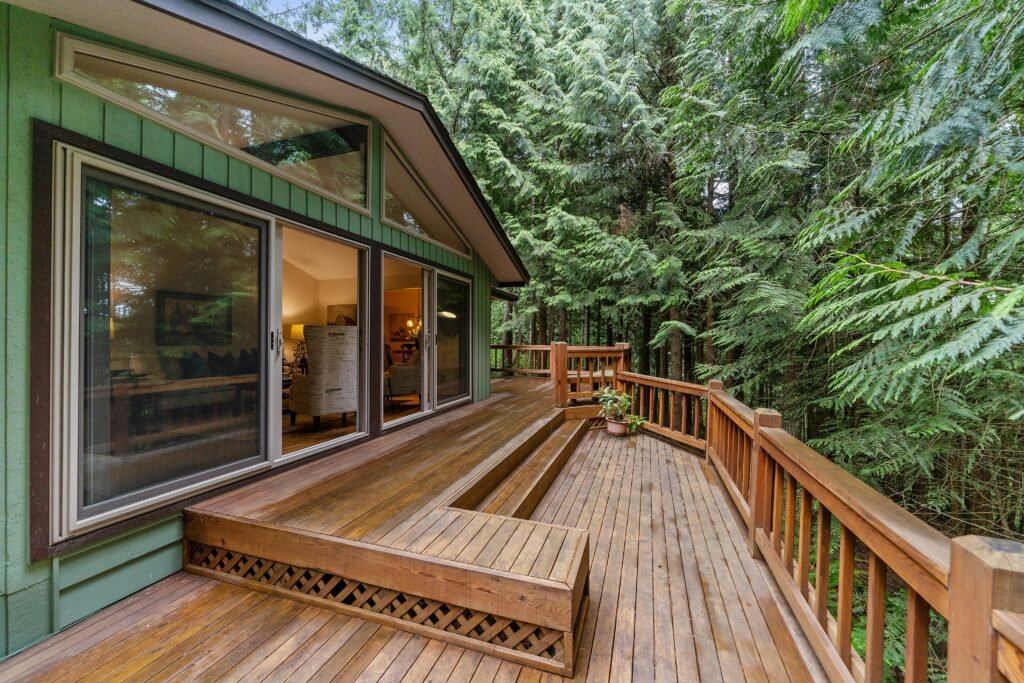
If you’ve been dreaming of transforming your backyard into a stylish and low-maintenance retreat, a Trex deck is one of the best investments you can make. Trex composite decking combines the natural look of wood with the durability of recycled materials, giving you a deck that resists fading, staining, and rotting for decades. Whether you’re a seasoned DIY enthusiast or hiring a professional, understanding the Trex deck installation guide will help you achieve the perfect result. In this article, we’ll walk you through everything you need to know—from planning and materials to step-by-step installation and finishing touches. What Is Trex Decking? Trex is a brand of composite decking made from a blend of 95% recycled wood fibers and plastic film. It’s designed to look like natural wood but requires far less maintenance. Unlike traditional lumber, Trex boards won’t warp, splinter, or rot, and they don’t need to be stained or sealed. This makes Trex an eco-friendly and long-lasting choice for homeowners who want beauty and performance without constant upkeep. It’s also slip-resistant and available in a wide range of colors and textures, allowing you to customize your outdoor space to match your home’s aesthetic. Planning Your Trex Deck Installation Before you begin, preparation is key. Proper planning ensures a smooth installation process and a deck that will last for years. 1. Measure and Design Your Deck Start by measuring your outdoor area and creating a design layout. Trex offers free online design tools that help you visualize your deck, experiment with patterns, and calculate the number of boards needed. Consider: Deck size and shape – rectangular, square, or multi-level. Board orientation – diagonal or parallel. Features – stairs, railings, built-in seating, or lighting. 2. Check Local Building Codes Always verify local building regulations before starting. Some areas require permits for decks above a certain height or attached to the home’s structure. 3. Choose Your Trex Decking Line Trex offers several product lines, including: Trex Enhance®: Budget-friendly and easy to install. Trex Select®: Balanced price and durability for most homes. Trex Transcend®: Premium line with maximum fade and stain resistance. Select your preferred color, grain pattern, and finish. 4. Gather Tools and Materials You’ll need: Tape measure and chalk line Level and framing square Circular saw or miter saw Drill or impact driver Deck screws or hidden fasteners Joist tape (to protect wooden framing) Safety gear (gloves, goggles, ear protection) Once you have your materials and tools ready, it’s time to get to work. Step-by-Step Trex Deck Installation Guide Step 1: Prepare the Deck Frame Trex decking must be installed on a strong, level, and properly spaced frame. You can use pressure-treated lumber or metal framing. Space joists 16 inches on center for standard decking. Use 12-inch spacing for diagonal installations to prevent flexing. Ensure joists are level and structurally sound before attaching decking. Apply flashing tape to the top of joists to prevent moisture damage and extend the life of the frame. Step 2: Lay the Starter Boards Begin installing decking along the outer edge of the deck frame. Secure the first board using starter clips or screws. Make sure it’s perfectly aligned, as it will guide the rest of the installation. For hidden fasteners, insert the clip into the groove of the first board and screw it into the joist. Step 3: Install the Remaining Deck Boards Continue laying boards across the joists, leaving a 1/8-inch to 1/4-inch gap between boards for expansion and drainage. Use Trex Hideaway® hidden fasteners for a clean, seamless look. If cutting boards, seal the ends with Trex end coat to protect against moisture. Stagger board joints for a natural appearance and added strength. As you progress, check alignment frequently to maintain straight rows. Step 4: Trim and Finish the Edges Once all boards are installed, trim the overhangs using a circular saw for a crisp edge. You can cover exposed edges with fascia boards or deck skirting for a polished finish. Trex fascia boards are designed to match your decking color, ensuring a unified look. Step 5: Add Railings and Accessories If your design includes railings, follow Trex’s specific railing installation instructions. Trex rail systems are modular and available in various styles, from modern aluminum to classic composite designs. You can also enhance your deck with accessories such as: Trex Deck Lighting: For built-in stair, railing, or post lights. Built-In Benches or Planters: To add comfort and functionality. Pergolas or Shade Structures: To create a relaxing outdoor retreat. Step 6: Clean and Inspect Once installation is complete, remove debris and sawdust from the surface. Clean the deck with a mild soap solution and water to remove any construction residue. Inspect all fasteners, joints, and edges to ensure everything is secure and level. Maintenance Tips for Trex Decks One of the biggest advantages of Trex decking is its low maintenance requirements. To keep it looking its best: Clean twice a year with soap and water or a composite deck cleaner. Avoid harsh chemicals like bleach, which can damage the finish. Sweep regularly to remove leaves and dirt. Use furniture pads to prevent scratching. Rinse after barbecues or spills to prevent staining. Trex decks resist mold and mildew, but good airflow and drainage will help maintain their appearance and longevity. Common Mistakes to Avoid Improper spacing: Always allow for expansion gaps. Tight installations can cause buckling in hot weather. Skipping flashing or joist tape: Moisture can damage wood framing if not protected. Mixing fasteners: Use Trex-approved fasteners and clips for warranty compliance. Uneven framing: An uneven substructure leads to visible board inconsistencies. Following manufacturer recommendations ensures your deck not only looks great but performs flawlessly for decades. Why Choose Trex for Your Decking Project? Trex has become the gold standard in composite decking due to its sustainability, style, and reliability. Each board contains recycled plastics equivalent to over 140,000 plastic bags, making it an eco-conscious choice. Its durability and resistance to weather mean you’ll spend more time enjoying your deck and less time maintaining
How to Get Rid of a Stump in 2–3 Days: Quick and Easy Methods
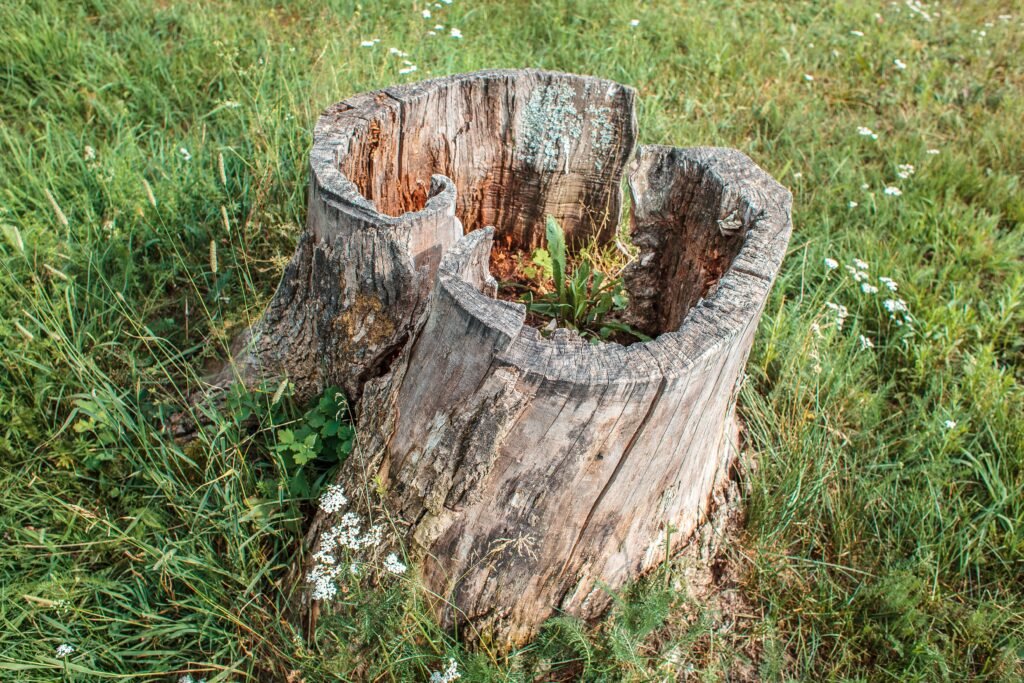
Tree stumps can be an eyesore in your yard, not to mention a tripping hazard or obstacle when mowing. Whether you recently cut down a tree or inherited one from a previous homeowner, you probably want it gone fast. The good news is you don’t have to wait weeks for it to decompose or spend hundreds hiring professionals. With the right approach, you can learn how to get rid of a stump in 2–3 days safely and effectively. Why You Should Remove Tree Stumps Quickly Leaving a tree stump in your yard may seem harmless, but it can cause more problems than you think. A leftover stump can start sprouting new growth, attract termites or carpenter ants, and even rot, creating a home for fungi or pests. Over time, it can damage nearby plants and ruin the appearance of your landscape. Removing it within a few days keeps your yard cleaner, safer, and ready for new landscaping projects. What You’ll Need Before starting, gather the right tools and materials. The exact method depends on whether you prefer a manual, chemical, or burning approach. In most cases, you’ll need: A power drill Epsom salt or potassium nitrate (stump remover) A chainsaw or handsaw Water and a bucket A tarp or plastic sheet Shovel and axe Safety gloves and goggles Once you have everything, you can choose the method that works best for your timeline and comfort level. Method 1: Using Epsom Salt or Chemical Stump Remover If you’re looking for a simple, low-effort solution, this method can break down a stump in just a few days. Epsom salt (magnesium sulfate) or commercial stump removers help speed up decomposition by drying out the wood. Step 1: Drill Holes into the Stump Use a power drill with a ½-inch bit to drill holes into the top of the stump. Space the holes about 2 inches apart and make them as deep as possible—around 8 to 12 inches if you can. Drill a few angled holes along the sides to help the solution penetrate the roots. Step 2: Add Epsom Salt or Stump Remover Pour Epsom salt or potassium nitrate into each hole until it’s full. These substances draw moisture from the wood, making it easier to break down. Step 3: Add Water and Cover Pour water into the holes to dissolve the salt and activate the process. Then, cover the stump with a tarp or plastic sheet to trap moisture and speed up decay. Keep the stump covered for 2–3 days. By the end, the wood will begin softening and breaking apart. You can then use an axe or shovel to remove the remaining pieces. Pro Tip For faster results, repeat the salt and water process after 24 hours. The more saturated the stump becomes, the quicker it will rot. Method 2: Burning the Stump If local regulations allow it, burning is one of the quickest ways to get rid of a stump in 2–3 days. It requires caution but can completely eliminate the stump without heavy machinery. Step 1: Drill and Fill Just like the chemical method, drill holes into the stump and fill them with a mixture of Epsom salt and kerosene. Let it soak for a few hours. Step 2: Ignite Safely Surround the stump with bricks or stones to contain the fire. Light the stump using a long match or lighter, and allow it to smolder. Keep a bucket of water or a hose nearby for safety. The burning process can take several hours, but after 1–2 days, the stump will turn to ash. Step 3: Dispose of the Remains Once the stump cools, use a shovel to remove the ashes and fill the hole with soil. This method is ideal if you need your yard cleared quickly and don’t mind some smoke and heat. Method 3: Manual Digging and Cutting If you prefer a hands-on approach, you can dig out the stump manually. It’s a bit of a workout, but it’s effective and chemical-free. Step 1: Expose the Roots Use a shovel to dig around the stump, exposing as many roots as possible. Remove the dirt until the root system is visible. Step 2: Cut the Roots Use a saw or axe to cut through the larger roots. For smaller roots, a pair of loppers will work. Once you’ve cut all the main roots, try rocking the stump back and forth to loosen it. Step 3: Pull Out the Stump After the roots are cut, the stump should lift out more easily. You can use leverage from a long piece of wood or even attach a tow strap to a vehicle to help pull it free. Fill the remaining hole with soil and level the ground. Method 4: Combination Method for Faster Results If you’re short on time, you can combine the salt and burning methods for even faster stump removal. First, drill holes and fill them with Epsom salt and water for one day. The next day, pour kerosene into the holes and light the stump. This approach speeds up decomposition and burning, allowing you to get rid of the stump in just 2–3 days. Safety Tips to Remember When learning how to get rid of a stump in 2–3 days, safety should always come first. Always wear gloves and protective goggles. Avoid using gasoline—it’s too volatile for controlled burning. Never leave a burning stump unattended. Check local fire regulations before starting. Keep children and pets away from the work area. What to Do After Removing the Stump Once the stump is gone, you can fill the hole with topsoil and reseed the area with grass. If you’re planning to plant a new tree, choose a spot at least a few feet away from the old stump site to give roots fresh soil to grow in. You can also use the cleared space for a garden bed, fire pit, or decorative stone feature. Conclusion Removing a tree stump doesn’t have to take weeks or require expensive
Signs of Grubs in Lawn: How to Spot and Stop These Hidden Lawn Destroyers
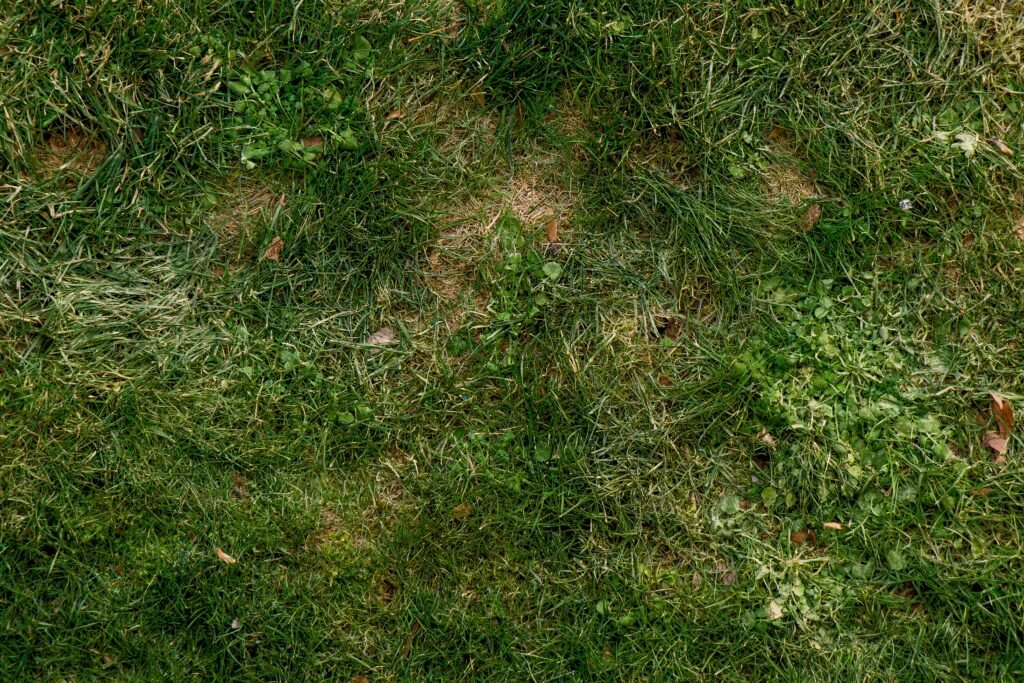
A lush green lawn is every homeowner’s dream, but beneath the surface, a silent pest might be destroying it from below. If your grass is suddenly turning brown, thinning out, or lifting up like a carpet, you could be dealing with grubs — one of the most common and damaging lawn pests. Understanding the signs of grubs in lawn early can save you from costly repairs and help you restore your yard before it’s too late. Let’s go over what grubs are, how to recognize their presence, and what you can do to get rid of them effectively. What Are Grubs? Grubs are the larval stage of several types of beetles, such as Japanese beetles, June bugs, and chafer beetles. These white, C-shaped larvae live in the soil and feed on the roots of grass. While a few grubs might not cause serious damage, a large infestation can destroy entire patches of lawn in a matter of weeks. They are usually about an inch long, with brown heads and soft white bodies. Grubs typically appear in late summer and early fall when beetles lay their eggs in the soil. Once hatched, they begin feeding aggressively before winter. Why Grubs Are a Problem Grubs feed on grass roots, cutting off the plant’s ability to absorb water and nutrients. As a result, the affected grass wilts, turns brown, and dies. What makes grub damage tricky is that it often looks like drought stress or a fungal problem, so homeowners may not realize the true cause until the damage spreads. Besides harming your lawn directly, grubs also attract predators such as raccoons, skunks, and birds that dig up your yard looking for a meal — making the problem even worse. Early Warning Signs of Grubs in Lawn Catching grub activity early is the key to saving your lawn. Here are the most common signs to watch for. 1. Irregular Brown Patches The most obvious sign of grubs in a lawn is random brown or yellow patches that don’t improve with watering. These areas often appear in late summer or early fall, when grubs are actively feeding on grass roots. Unlike drought damage, grub-infested grass peels up easily because the roots have been eaten. If you tug gently at the grass and it lifts off the soil without resistance, it’s a strong indicator that grubs are underneath. 2. Spongy or Soft Soil When grubs are present, they loosen the soil as they move and feed. Walking across an infested area may feel soft or bouncy underfoot, similar to a sponge. This is caused by the separation between the roots and the soil. To test this, press down with your foot in different parts of the lawn. If certain sections feel unusually soft or uneven, it’s worth checking below the surface. 3. Increased Animal Activity Raccoons, skunks, crows, and even armadillos love to dig for grubs. If you notice animals tearing up your lawn overnight or birds pecking excessively at one area, it could mean they’ve detected grub larvae beneath the surface. While the animals themselves aren’t the main problem, their digging can cause serious damage to your lawn and expose the underlying infestation. 4. Thinning Grass That Won’t Grow Back When grubs destroy grass roots, the affected patches won’t recover even with watering and fertilizer. If you’ve tried feeding and reseeding but the grass still won’t grow, grubs may be to blame. Look for thin or dead patches surrounded by healthy grass. The contrast often becomes most noticeable in late summer when temperatures rise and the lawn struggles to take up water through damaged roots. 5. Visible Grubs Under the Soil The most reliable way to confirm a grub problem is to dig a small section of your lawn. Use a spade or shovel to remove a square foot of turf about two to three inches deep. If you find more than five or six white, C-shaped grubs in that section, you likely have an infestation that needs treatment. Healthy lawns can tolerate a few grubs, but higher numbers can cause noticeable damage. 6. Grass Peeling Up Like a Carpet Because grubs sever the grass roots, large sections of turf may lift easily from the ground. If you can roll the grass back like a mat, it’s a clear sign of grubs in lawn. You may even see the grubs wriggling underneath in the soil. This symptom usually appears when the infestation is severe and the root system is almost completely destroyed. When to Look for Grubs Grub damage often becomes visible in late summer or early fall, which is when the larvae are most active. However, by this point, they’ve usually done significant damage. To stay ahead of the problem, inspect your lawn in spring as well. While grubs are smaller and less active in cooler months, early detection allows for preventive treatment before they start feeding again in summer. How to Confirm a Grub Infestation A simple inspection can tell you if grubs are present: Cut a 12-inch square of sod in a brown or suspicious area. Peel it back and look through the top layer of soil. Count the number of grubs you find. 0–5 grubs: Normal; no need for treatment. 6–10 grubs: Moderate; monitor and consider preventive measures. 10+ grubs: Severe; treatment needed immediately. The more grubs you find, the more urgent it is to act before they spread further. How to Treat a Grub Problem Once you’ve confirmed grubs are present, there are several options to eliminate them. 1. Natural Methods If you prefer an eco-friendly approach, try introducing beneficial nematodes — microscopic worms that attack and kill grubs naturally. They’re safe for pets and people and can be applied easily with a garden sprayer. Another option is using milky spore powder, which targets Japanese beetle grubs and builds up long-term protection in your soil. 2. Chemical Treatments For severe infestations, insecticides containing imidacloprid, carbaryl, or chlorantraniliprole can be effective. Apply them during late summer when grubs are
What Is a Good Lawn Care Schedule: Tips for a Healthy, Lush Lawn
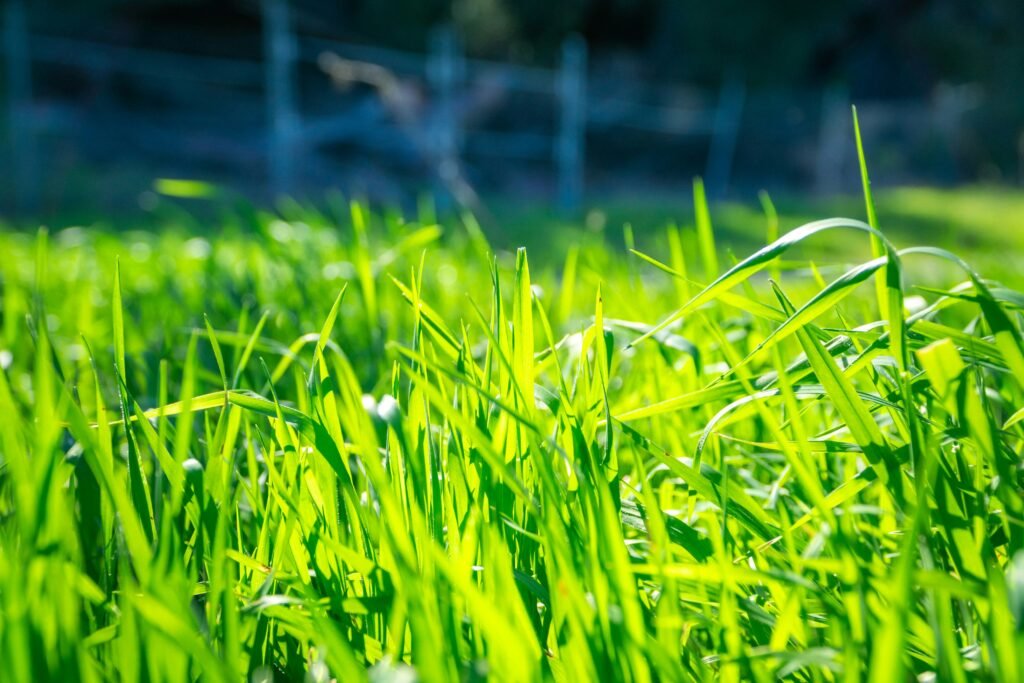
Maintaining a healthy and beautiful lawn requires planning, consistency, and understanding the needs of your grass. Many homeowners ask, what is a good lawn care schedule to keep their yard green, weed-free, and thriving all year round. A proper lawn care routine not only enhances curb appeal but also prevents costly problems such as pests, diseases, and bare patches. Understanding Your Lawn’s Needs Before creating a lawn care schedule, it is essential to know your grass type and climate. Different grass species, such as Kentucky bluegrass, fescue, Bermuda, or ryegrass, have unique requirements for watering, fertilization, and mowing. Local weather conditions, soil type, and sunlight exposure also influence how often and when you should care for your lawn. Knowing these factors helps you develop a routine tailored to your yard. Weekly Lawn Care Tasks Regular weekly care keeps your lawn in top shape. Essential weekly tasks include: Mowing: Cut your grass to the recommended height for your grass type. Avoid cutting more than one-third of the blade at a time to prevent stress. Watering: Lawns generally require 1 to 1.5 inches of water per week, either from rainfall or irrigation. Water early in the morning to reduce evaporation and fungal growth. Weed inspection: Check for weeds such as dandelions or crabgrass and remove them promptly to prevent spreading. Consistent weekly attention prevents minor issues from becoming major problems. Monthly Lawn Care Tasks Certain tasks are best performed once a month to maintain lawn health: Fertilization: Depending on your grass type, apply fertilizer to provide essential nutrients. A slow-release fertilizer is ideal for consistent growth. Pest control: Inspect for signs of insect damage and treat if necessary. Common pests include grubs, chinch bugs, and sod webworms. Aeration (optional): For compacted soil, monthly light aeration helps improve air, water, and nutrient penetration. By including monthly tasks in your schedule, your lawn receives long-term care that supports vigorous growth. Seasonal Lawn Care Schedule A yearly lawn care schedule varies with the seasons, focusing on specific needs during each part of the year: Spring Spring is the time to repair winter damage and prepare for active growth. Key tasks include: Raking to remove debris and dead grass Aerating to relieve soil compaction Fertilizing to encourage root and blade growth Overseeding bare patches to promote density Pre-emergent weed control to prevent crabgrass Spring is also ideal for inspecting your lawn for early signs of pests or diseases. Summer Summer care focuses on maintaining growth and protecting against heat stress: Mow regularly, slightly higher to shade the soil Water deeply but less frequently to encourage deep roots Spot-treat weeds as they appear Monitor for pests and diseases that thrive in hot weather Avoid heavy foot traffic during peak heat to prevent stress Proper summer care ensures your lawn remains resilient during the hottest months. Fall Fall is a critical period for lawn recovery and preparation for winter: Aerate to relieve soil compaction Fertilize with a slow-release, high-phosphorus formula to strengthen roots Overseed to fill in bare patches Remove leaves and debris to prevent mold or fungal issues Prepare irrigation systems for winter shutdown Fall maintenance sets the foundation for a healthy lawn the following spring. Winter During winter, lawn growth slows, but care is still important: Clear debris and fallen leaves regularly Avoid excessive foot traffic on frozen grass Keep tools and equipment maintained for spring use Plan your spring schedule and order any supplies needed Even in dormancy, simple maintenance prevents problems when the growing season returns. Tips for a Successful Lawn Care Schedule Consistency is key: Stick to your schedule to avoid gaps in care. Adjust for weather: Modify watering and mowing frequency depending on rainfall and temperature. Monitor soil health: Periodically test your soil for pH and nutrient levels. Invest in quality tools: Sharp mower blades, sprinklers, and aerators improve efficiency and results. Keep records: Track fertilization, watering, and pest treatments to refine your schedule over time. Conclusion A healthy lawn does not happen by chance. Knowing what is a good lawn care schedule and following it diligently ensures your yard stays lush, green, and inviting year-round. By combining weekly, monthly, and seasonal tasks with attention to soil, grass type, and climate, you can prevent common problems like weeds, pests, and bare patches. Regular care not only improves curb appeal but also increases the longevity and vitality of your lawn. With a structured lawn care schedule, homeowners can enjoy a thriving outdoor space with minimal stress and maximum results. Investing time in planning and maintenance ensures your lawn remains a beautiful, resilient feature of your home.
Does Tree Removal Include Roots? What Homeowners Should Know
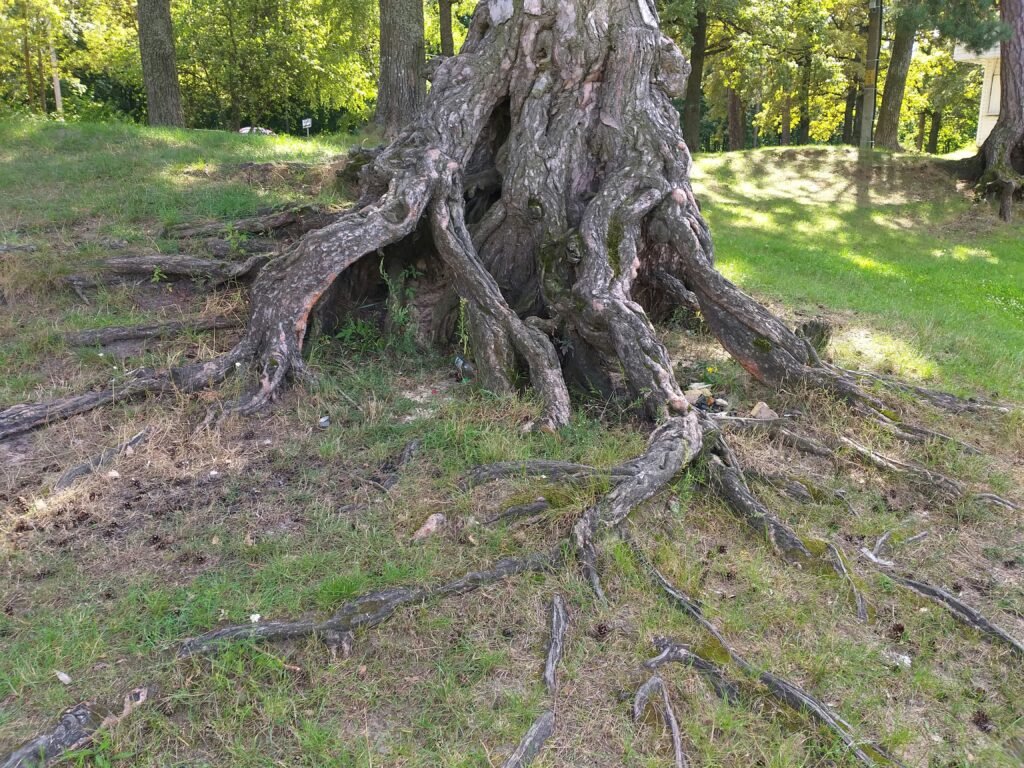
Tree removal is a major task for any homeowner, and it often raises questions about the process and costs. One common question is, does tree removal include roots? Understanding what tree removal covers can help you plan effectively, avoid surprises, and ensure your property is safe and attractive after the work is done. Understanding Tree Removal Tree removal involves cutting down and safely taking away a tree from your property. The process typically includes assessing the tree’s health, trimming branches, cutting down the trunk, and hauling away debris. While this sounds straightforward, the treatment of the roots is a separate matter. Tree roots can extend far beyond the tree trunk and may interfere with sidewalks, foundations, or landscaping. Deciding whether to remove the roots is important for both safety and aesthetics. What Tree Removal Usually Includes Most standard tree removal services cover: Assessment of the tree: Inspecting for health issues, stability, and potential hazards. Pruning or trimming branches: Reducing size and controlling the fall of limbs. Cutting the trunk: Using chainsaws or other equipment to safely bring down the tree. Debris removal: Hauling away branches and the trunk for disposal or recycling. However, removing the roots is often considered an additional service. Some companies may grind the stump or excavate the roots for an extra fee, while basic tree removal may leave the stump and roots in place. Why Roots May Be Left Behind There are several reasons why roots are sometimes not removed during tree removal: Cost: Excavating roots can be labor-intensive and requires specialized equipment. Soil disruption: Removing large roots can disturb the surrounding soil, affecting nearby plants or structures. Time constraints: Grinding or removing roots adds extra time to the project. Alternative solutions: Stump grinding or chemical treatments can help manage roots without full removal. Understanding these factors helps homeowners know what to expect and plan accordingly. Options for Root Removal If you want the roots removed after tree removal, there are a few options: 1. Stump Grinding Uses a grinder to break the stump and roots into small pieces. Typically reaches a few inches below the surface. Leaves mulch that can be used in landscaping. Less invasive than full root excavation. 2. Full Root Excavation Completely removes the stump and surrounding roots. May require heavy machinery. Ideal for large trees where roots could interfere with foundations or driveways. More expensive than stump grinding. 3. Chemical Stump Removal Involves applying a chemical solution to accelerate decay. Works over weeks or months. Suitable for homeowners who are not in a hurry but want the stump and roots to decompose naturally. Factors That Influence Root Removal Costs Several factors can affect how much root removal costs if it is not included in standard tree removal: Tree size: Larger trees have more extensive roots, increasing the effort required. Root location: Roots near buildings or underground utilities require extra care. Soil type: Rocky or compact soil makes excavation more difficult. Equipment needed: Heavy machinery or specialized grinders may be necessary. Disposal: Removing roots from the property can involve additional hauling costs. Being aware of these factors helps you budget accurately for tree and root removal. Benefits of Removing Roots Removing tree roots after removal offers several advantages: Prevents regrowth: Stumps and roots left behind can sprout new shoots. Improves safety: Eliminates tripping hazards and protects foundations or pavements. Enhances aesthetics: Creates a clean, level surface for landscaping or construction. Prevents pests: Decaying stumps can attract insects or rodents. Even if root removal adds cost, the long-term benefits often justify the investment. Tips for Homeowners Ask upfront: Clarify with your tree service whether root removal is included. Compare options: Stump grinding, root excavation, and chemical removal all have pros and cons. Check local regulations: Some municipalities have rules about stump and root disposal. Plan landscaping: Decide how you want the area treated after tree and root removal. Being informed ensures that your property is safe, attractive, and ready for future landscaping projects. Conclusion So, does tree removal include roots? In most cases, standard tree removal covers cutting down the tree and hauling away the trunk and branches, but not the roots. Root removal is usually an additional service that can be done through stump grinding, full excavation, or chemical treatments. Removing roots offers benefits such as preventing regrowth, protecting your property, and improving aesthetics. Homeowners should discuss options, costs, and long-term goals with their tree service provider to make the best choice. By understanding what tree removal entails and planning for roots, you can ensure a safe, clean, and beautiful property while avoiding unexpected expenses.
JR & DUBON TREE SERVICE LLC, One of the Best Construction Companies in Boston

Planning a construction project in Boston can be exciting but also overwhelming. Whether it is a home renovation, office build, or large commercial project, choosing the right company is key. That is why JR & DUBON TREE SERVICE LLC, one of the best construction companies in Boston stands out. They combine affordability, expertise, and reliability, making projects smoother from start to finish. Boston has a vibrant construction scene. In fact, Massachusetts construction output reached $35.8 billion in 2024 according to the US Census Bureau. With so many firms around, knowing which company can deliver quality without breaking the bank is essential. Why JR & DUBON TREE SERVICE LLC Stands Out When looking for construction companies in Boston, there are several reasons this company is highly recommended. Experience: They have years of hands-on experience handling both residential and commercial projects.Cost-Effective Solutions: Quality does not have to be expensive, and JR & DUBON TREE SERVICE LLC offers competitive pricing.Skilled Team: Their team includes certified professionals trained to manage complex projects safely and efficiently.Customer Satisfaction: Many clients praise their clear communication and ability to finish projects on time. Choosing the right contractor is more than just hiring a team. It is about partnering with people who understand your vision and bring it to life with precision. Types of Construction Services Offered Whether you are planning a small renovation or a larger build, JR & DUBON TREE SERVICE LLC, one of the best construction companies in Boston can handle it all. Here are some of the services they offer: Residential Construction: Home additions, remodeling, and custom builds.Commercial Projects: Offices, retail spaces, and small-scale industrial facilities.Outdoor Projects: Decks, patios, fences, and landscaping structures.Maintenance and Repairs: Structural repairs, painting, and general upkeep. This versatility makes them a one-stop solution for most construction needs, saving time and hassle by working with a single trusted provider. Tips for Choosing the Right Construction Company in Boston Not every construction company fits every project. Here are some practical tips to help make your decision easier: Check Credentials: Make sure the company is licensed and insured for the type of work you need.Look at Past Projects: Request references or visit completed projects to see their quality firsthand.Ask About Timelines: A reliable company will provide realistic schedules and keep you updated.Budget Transparency: Confirm all costs upfront to avoid surprises later.Communication Matters: Good contractors listen to your needs and explain processes clearly. Following these tips can prevent common headaches during construction and ensure a smoother experience. Fun Fact About Boston Construction Boston has over 5,000 active construction projects across residential, commercial, and public sectors in 2025. That is a lot of building. It highlights the importance of selecting a company that can navigate local regulations, safety standards, and logistical challenges effectively. JR & DUBON TREE SERVICE LLC, one of the best construction companies in Boston is familiar with the local scene, giving clients an advantage in completing projects efficiently. Conclusion: Building Your Dream Project Boston’s construction landscape can be competitive, but the right partner makes all the difference. JR & DUBON TREE SERVICE LLC, one of the best construction companies in Boston combines quality, affordability, and professionalism to ensure projects are delivered smoothly. From initial planning to final touches, having a trustworthy construction company by your side means less stress and better results. Every strong project begins with a solid foundation, and the right team is the first step.